
Origami, the ancient Japanese art of paper folding, has evolved far beyond traditional cranes and flowers. Today, advanced origami techniques allow artists and enthusiasts to create stunning sculptures, realistic figures, and even intricate mathematical structures.
If you’re ready to take your folding skills to the next level, keep reading. We’ll cover the benefits of mastering complex folds, essential materials, step-by-step techniques, common mistakes, and where you can continue learning.

Why Learn Advanced Origami?
Diving into advanced origami isn’t just about making impressive art. It also brings several valuable benefits:
- Improves fine motor skills: Precision is key when working with tiny, detailed folds.
- Boosts problem-solving abilities: Complex diagrams challenge your logical thinking and patience.
- Opens artistic opportunities: Many artists sell their pieces or showcase them in exhibitions.
By mastering these techniques, you’re not just folding paper — you’re sharpening your mind and creating art.
Essential Materials for Advanced Folds
To succeed in advanced projects, having the right materials makes all the difference:
- Specialty papers like Washi, kraft paper, or sheets treated with methylcellulose (ideal for “wet folding”) offer better flexibility and strength.
- Precision tools such as tweezers, bone folders, and rulers help create sharp, clean creases.
- A smooth, well-lit workspace minimizes errors and keeps your folds accurate.
Investing in quality supplies will save you time and frustration as you tackle more complex models.
Step-by-Step: Must-Know Advanced Techniques
Here are a few techniques that every aspiring advanced origamist should master:
1. Double Reverse Fold
Perfect for creating articulated legs, beaks, or heads on animal models.
Tip: Make light guide creases before pressing firmly to ensure perfect alignment.
2. Tessellations (Geometric Patterns)
Tessellations involve repeating patterns, creating mesmerizing visual effects.
Start simple with hexagons or squares before moving on to intricate grids and twists.
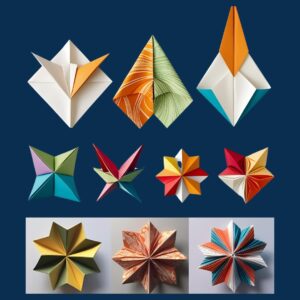
3. Modular Origami
This technique combines several folded units into larger 3D structures, such as polyhedra or complex sculptures.
Pro tip: Use different colored papers to create striking contrasts and make your final model pop.
Common Mistakes (and How to Avoid Them)
Even experienced folders make mistakes. Here’s how you can prevent the most common issues:
- Paper tearing? Choose flexible, durable paper and avoid applying excessive pressure.
- Misaligned folds? Always use a ruler or folding guide for accuracy.
- Struggling with complex diagrams? Watch slow-motion video tutorials to fully understand each movement.
Remember, patience is key. Mastery doesn’t come overnight — but every project makes you better!
Where to Learn More About Advanced Origami
Want to go even deeper into the world of advanced folds? Check out these resources:
- Books: Advanced Origami by Michael LaFosse and Origami Tessellations by Eric Gjerde are must-reads.
- YouTube Channels: Tadashi Mori and Jo Nakashima provide detailed, step-by-step tutorials.
- Communities: Join forums like Reddit’s r/origami to ask questions, get feedback, and share your progress.
Final Tip: Challenge Yourself!
When starting with advanced origami, choose projects that are challenging — but not overwhelming. Consistent practice with slightly difficult models will gradually build your skills and confidence. Before you know it, you’ll be creating masterpieces that once seemed impossible.