

The fascination with medieval writing continues to inspire many people to learn ancient techniques that date back centuries. If you’ve always wanted to master gothic calligraphy, create handmade parchment in the medieval style, or add golden illumination to your manuscripts, this guide is for you. Let’s explore the basics of each of these skills and how you can practice them at home!
1. Gothic Calligraphy Course for Beginners: How to Practice at Home and Master Medieval Writing
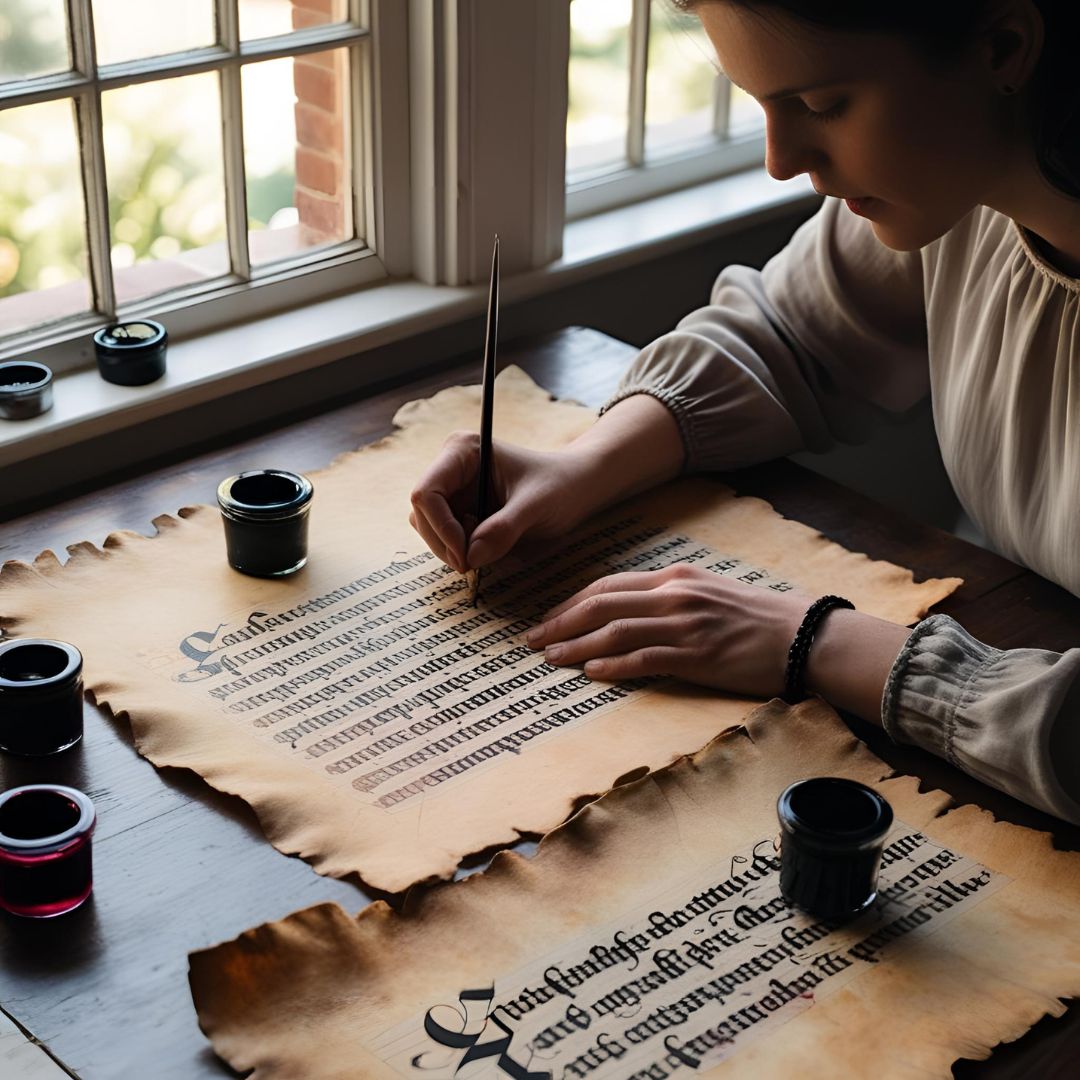
Gothic calligraphy is one of the most iconic forms of medieval writing, famous for its elegant and angular lines. With its distinct style, it’s the perfect choice for those who want to delve into historical calligraphy practices. But how do you get started?
Materials Needed for Gothic Calligraphy
- Calligraphy pen or quill: For gothic writing, it’s recommended to use a broad, flat nib pen. If you don’t have a quill, you can use a dual-tipped pen or a fountain pen that allows you to vary the thickness of the lines.
- Black or brown ink: While black ink is the most traditional, you can experiment with other colors depending on your taste and style.
- Quality paper: Smooth-textured papers are ideal for gothic calligraphy, as they allow ink to flow smoothly.
- Ruler and pencil: For drawing guidelines and ensuring your letters are straight.
Practical Exercises for Beginners
- Practice basic strokes: Before you start writing full words, it’s important to master the basic strokes. Gothic calligraphy is made up of a combination of straight and curved lines, so practice these shapes until you’re comfortable.
- Write the alphabet: Once you’ve mastered the strokes, practice the letters of the alphabet. Remember that gothic calligraphy has angular and elegant shapes, with variations in each letter.
- Practice words: Start writing simple words and gradually increase the difficulty as you become more confident. Try writing entire texts, such as quotes or verses, to improve your flow.
Online Courses and Resources
If you want to dive deeper into gothic calligraphy, there are various online courses that offer detailed guidance. Platforms like Udemy, Skillshare, and YouTube offer both free and paid tutorials for beginners and intermediate calligraphers. Look for courses that offer practical demonstrations so you can follow along and practice simultaneously.
2. How to Create Handmade Parchment in the Medieval Style: A Practical Guide
Nothing complements medieval calligraphy better than a handmade parchment. Creating handmade parchment in the medieval style is a great way to add an authentic touch to your manuscripts. Here’s how you can recreate this process simply!
Materials Needed
- Handmade or textured paper: You can use recycled paper or even watercolor paper to create the base for your parchment.
- Strong tea or coffee: To age the paper, use tea or coffee to give it a yellowed, aged look.
- Calligraphy pen or quill: For writing, you can use a calligraphy pen or fountain pen with black ink.
- Varnish (optional): To protect the ink and give it a glossy finish.
Steps to Create Handmade Parchment
- Age the Paper: Start by soaking the paper in tea or coffee. Then, let it dry completely. This will give it an old, worn appearance.
- Shape the Parchment: Fold the edges of the paper to create the shape of parchment. For a more authentic touch, you can slightly burn the edges with a candle.
- Write on the Parchment: Use your medieval calligraphy or any writing style you prefer. The texture of the parchment will help bring out the beauty of your writing.
3. Techniques for Illuminating Manuscripts with Golden Ink: Bringing Your Medieval Calligraphy to Life
Illuminated manuscripts were popular in the Middle Ages, with artists using golden ink and other luxurious details to bring texts to life. Manuscript illumination not only adds beauty but also symbolized the importance of religious and historical texts.
Materials for Illumination
- Golden ink or gold leaf: Golden ink is the more accessible option for beginners, but gold leaf provides a more realistic and luxurious finish.
- Fine brushes: To apply the gold details, you’ll need fine, precise brushes.
- Black or brown ink: For the calligraphy, which will serve as the base for the golden details.
Steps for Illumination
- Write Your Manuscript: Start by writing your text or calligraphy in black or brown ink. Apply the ink firmly to create a solid base for the illumination.
- Apply Golden Ink: Using a fine brush, add golden details to the initials of words, the edges of the pages, or even small illustrations like flowers or geometric patterns.
- Use Gold Leaf: For a more luxurious touch, use gold leaf instead of golden ink. Apply the gold leaf carefully, pressing it onto the desired areas and ensuring it adheres to the calligraphy.
Whether you’re a gothic calligraphy enthusiast, someone interested in creating handmade parchment, or an artist who wants to add golden illumination to your manuscripts, these medieval writing techniques will transform your projects. With patience and practice, you can master these arts and create unique, timeless pieces. Don’t forget to explore the recommended courses and tutorials to continue improving your skills!